Winterization in Kyiv: understanding the challenge
Ongoing pressure on Ukraine’s energy system means that power supply in Kyiv can remain unstable during the winter period. Scheduled or unscheduled outages have become a practical constraint that households factor into everyday planning, particularly during cold spells when energy demand is high.
When electricity is unavailable, systems that depend on it stop working immediately. This primarily affects electric and centrally controlled heating, which can cause indoor temperatures to drop quickly during cold periods. In apartments and houses where heating is fully tied to the grid, even short outages can significantly reduce comfort and increase heat loss if no alternative measures are in place.
Winterization in this context is about adapting homes and routines to these constraints. The goal is to maintain basic comfort, functionality, and safety during periods of limited power, using solutions that work independently of the grid or reduce dependence on it.
How to Prepare Your Home for Blackouts
Step 1. Reduce heat loss before you add heat
Start with what your home already has. Seal obvious air leaks around windows, balcony doors, and entry doors using weatherstrips or temporary seals. Use thick curtains or thermal blinds, especially at night. Close off unused rooms and focus on keeping one main living space warm. Even basic measures can noticeably slow down heat loss and reduce energy demand.
Start with what your home already has. Seal obvious air leaks around windows, balcony doors, and entry doors using weatherstrips or temporary seals. Use thick curtains or thermal blinds, especially at night. Close off unused rooms and focus on keeping one main living space warm. Even basic measures can noticeably slow down heat loss and reduce energy demand.
Step 2. Plan for essential electricity only
During outages, think in terms of priorities, not full replacement. Identify what really needs power: lighting, phone charging, basic communication, and control electronics for heating or monitoring devices. Avoid overloading backup systems. Simple habits like switching to LED lamps and charging devices during short power windows make a difference.
During outages, think in terms of priorities, not full replacement. Identify what really needs power: lighting, phone charging, basic communication, and control electronics for heating or monitoring devices. Avoid overloading backup systems. Simple habits like switching to LED lamps and charging devices during short power windows make a difference.
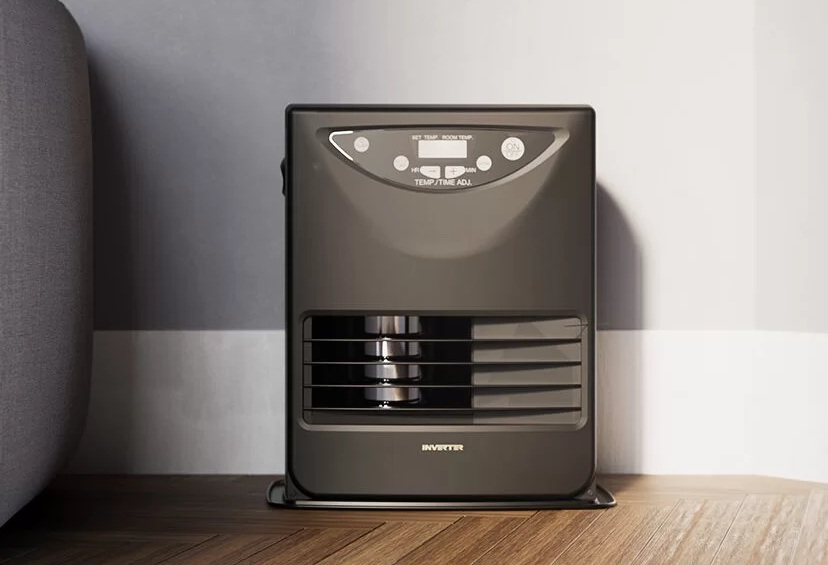
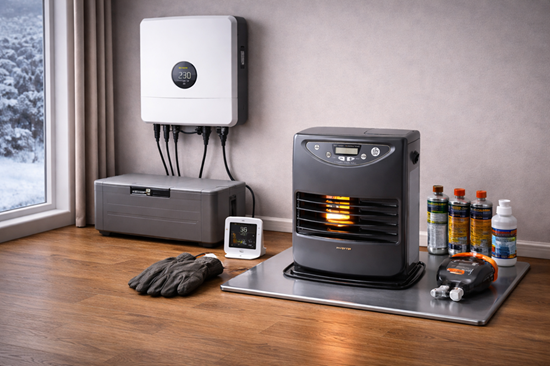
Step 3. Choose heating carefully and set it up safely
If you use non-electric or backup heaters, place them on a stable, non-flammable surface such as a metal mat. Keep clear space around the heater and never block airflow. Use heaters only as intended and avoid moving them while operating. Always assume limited ventilation and plan accordingly.
If you use non-electric or backup heaters, place them on a stable, non-flammable surface such as a metal mat. Keep clear space around the heater and never block airflow. Use heaters only as intended and avoid moving them while operating. Always assume limited ventilation and plan accordingly.
Step 4. Install carbon monoxide and smoke detectors
Any heater that involves combustion requires additional safety layers. Install carbon monoxide detectors in the room where the heater is used and near sleeping areas. Check batteries regularly. Smoke detectors should also be present and functional. These devices are not optional; they are part of the setup.
Any heater that involves combustion requires additional safety layers. Install carbon monoxide detectors in the room where the heater is used and near sleeping areas. Check batteries regularly. Smoke detectors should also be present and functional. These devices are not optional; they are part of the setup.
Step 5. Ensure basic fire safety readiness
Keep a fire extinguisher easily accessible and make sure everyone in the household knows where it is and how to use it. Do not store fuel, aerosols, or flammable materials near heaters or electrical equipment. Maintain clear access paths and avoid improvising with unsuitable materials.
Keep a fire extinguisher easily accessible and make sure everyone in the household knows where it is and how to use it. Do not store fuel, aerosols, or flammable materials near heaters or electrical equipment. Maintain clear access paths and avoid improvising with unsuitable materials.
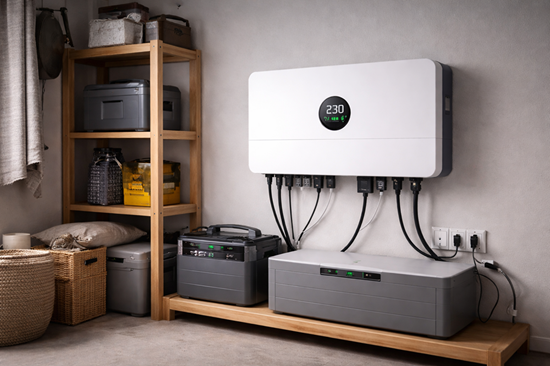
Step 6. Organize your equipment and cables
Place power equipment, batteries, and inverters in well-ventilated, dry areas away from direct heat sources. Avoid tangled cables and temporary connections. A clean, organized setup reduces the risk of overheating, short circuits, and accidental damage.
Place power equipment, batteries, and inverters in well-ventilated, dry areas away from direct heat sources. Avoid tangled cables and temporary connections. A clean, organized setup reduces the risk of overheating, short circuits, and accidental damage.
Step 7. Build routines, not just setups
Preparation is not a one-time action. Test devices before you need them, periodically check detectors, and review safety rules with household members. Know how to shut everything down quickly if needed. A calm, routine approach is what makes blackout periods manageable rather than stressful.
Preparation is not a one-time action. Test devices before you need them, periodically check detectors, and review safety rules with household members. Know how to shut everything down quickly if needed. A calm, routine approach is what makes blackout periods manageable rather than stressful.
This approach focuses on efficiency first, safety always, and realistic use under blackout conditions.